Since you're familiar with Docker, this is the easiest and most reliable way to run SQL Server on a Mac.
Steps:
-
Install Docker (if not already installed)
-
Download and install Docker Desktop for Mac.
-
Alternatively, you can run brew install docker
-
Check and see if Docker has been installed by typing docker --version
-
Run SQL Server Container Open your terminal and run:
docker run -e 'ACCEPT_EULA=Y' -e 'SA_PASSWORD=YourStrongPassword!' \-p 1433:1433 --name sqlserver \-d mcr.microsoft.com/mssql/server:2022-latest
-
Replace 'YourStrongPassword!' with a strong password that meets SQL Server's complexity requirements.
-
You can also change the name “sqlserver” if you want to.
-
This command will:
-
Pull the SQL Server image from the Microsoft container registry.
-
Expose SQL Server on port 1433.
-
Start the container as 'sqlserver'.
-
Verify That SQL Server Is Running Run:
docker ps
-
If you are able to see your container, that means it is running.
-
You can also open up the Docker Desktop, and see everything from there including restarting/starting the container.
-
Connect Using Azure Data Studio
-
Install Azure Data Studio.
-
Make sure you also have the extension “SQL Server dacpac extension” (See Step 6)
-
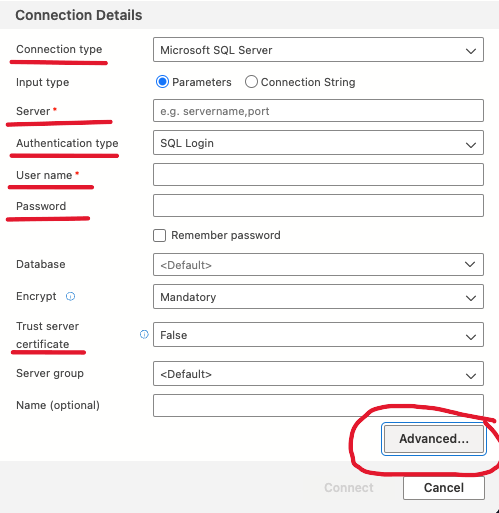
Open Azure Data Studio and create a new connection.
-
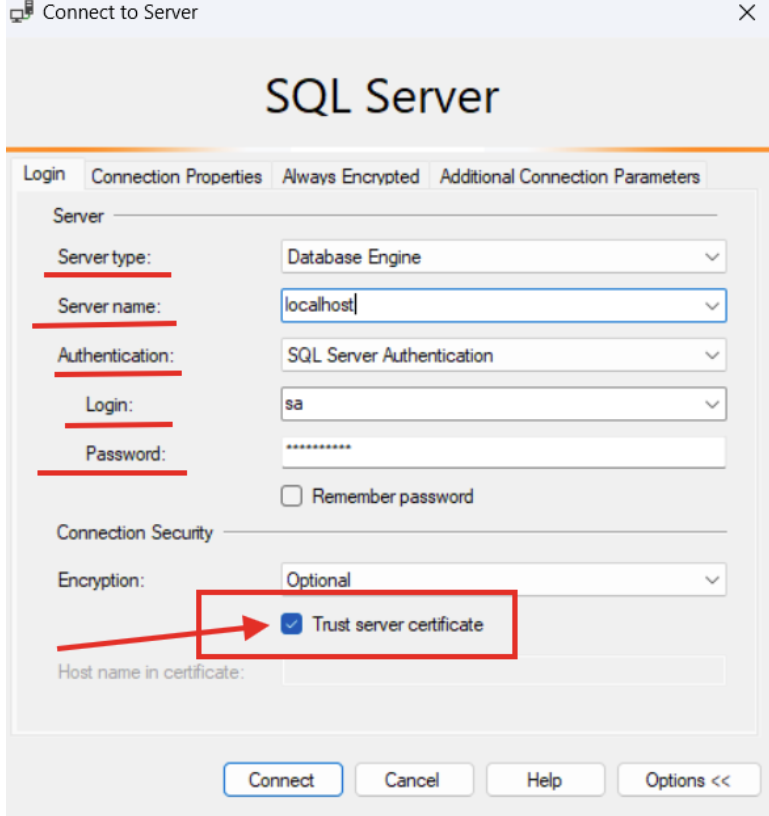
Server: localhost
-
Authentication: SQL Login
-
User: sa
-
Password: YourStrongPassword!
-
Port: 1433
-
Set Trust Server Certificate to True to bypass SSL certificate validation. This is necessary when connecting to a local Docker container
-
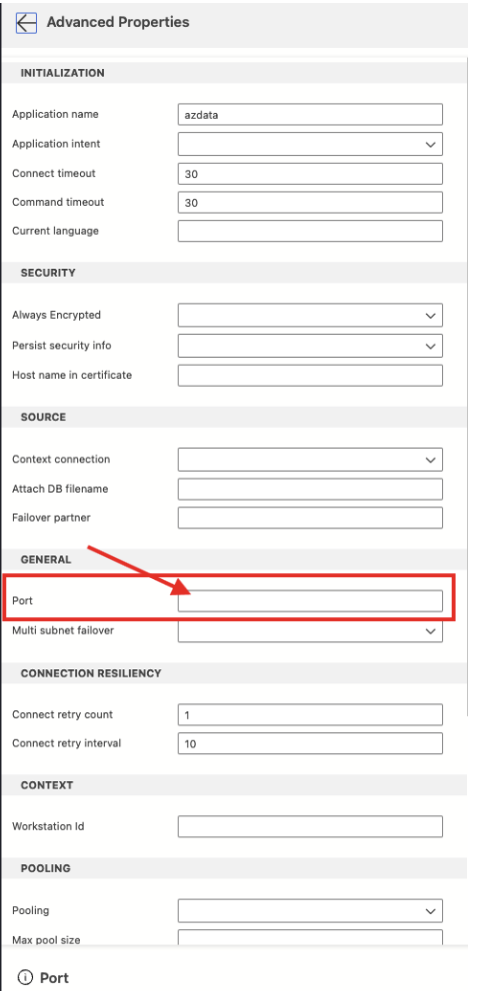
In the “Advanced…” tab you need to set the Port to 1433.
-
Then you should be able to press connect and connect to the database.