Customers can upgrade or move their projects to a dedicated plan, but downgrading is our responsibility. Follow these steps to ensure a smooth downgrade process.
Downgrading a Project Plan in Umbraco Cloud
Pre-Downgrade Checks
General
Step 1: Pre-Downgrade Checks
Before proceeding with the downgrade:
- Request Full Admin Access
- This access is necessary in case any issues arise during the downgrade process. Having full control over the project will help expedite troubleshooting.
- Schedule the Downgrade
- Ask the customer for a specific time window when the downgrade can take place.
- Ensure that no one is actively working in the backoffice during the process.
- Check the Frontend Usage
- Some customers may use their cloud project as a headless solution. Confirm how they use it to avoid confusion when checking the site availability after the downgrade.
- Verify Bandwidth Usage
- Bandwidth resets at the end of the month, regardless of the plan.
- If a project was auto-upgraded due to exceeding its bandwidth limit, it cannot be downgraded immediately.
- Example: A project on a Starter plan (50GB bandwidth) that got auto-upgraded to Standard because they have used 150GB bandwidth cannot be downgraded back until the new month starts, since this will make the project auto-upgrade automatically.
Important
As an update to the downgrade workflow, please note that refunds are not provided to customers, regardless of when the downgrade occurs.
Initiate the Downgrade Process
Step 2: Initiate the Downgrade Process
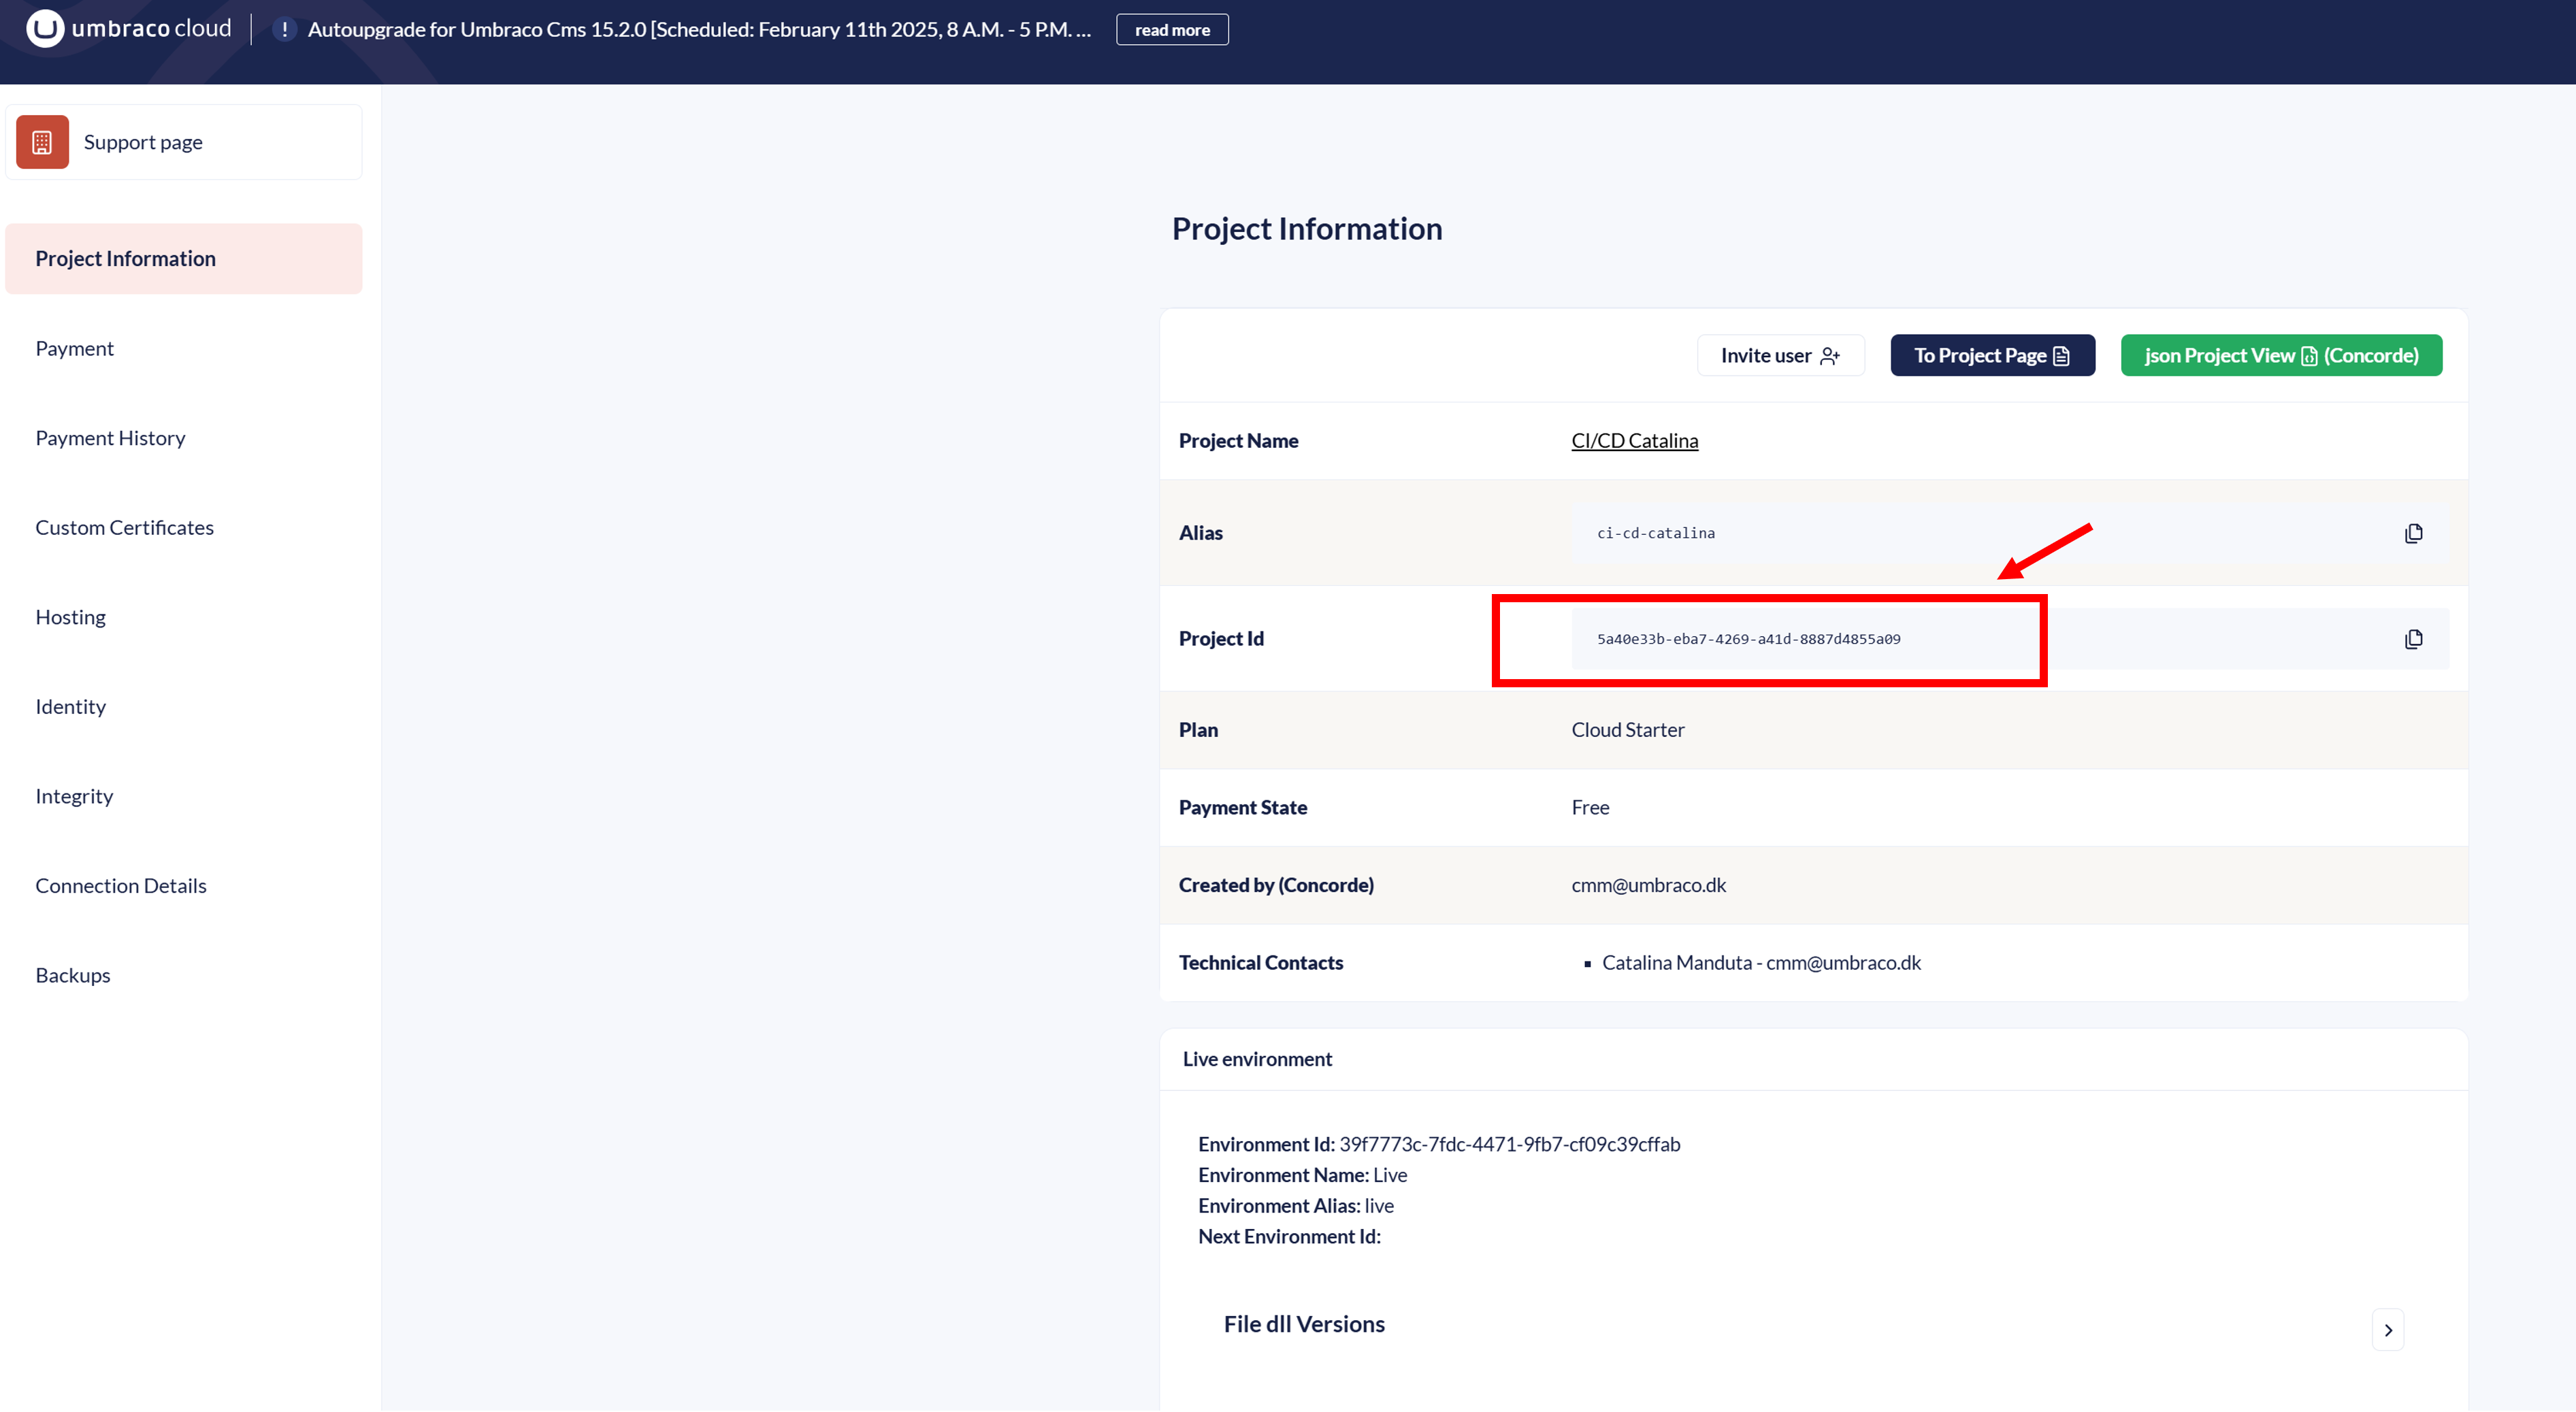
- Access the Project Support Page
- Navigate to: Umbraco Project Support
- Copy the Project GUID ID.
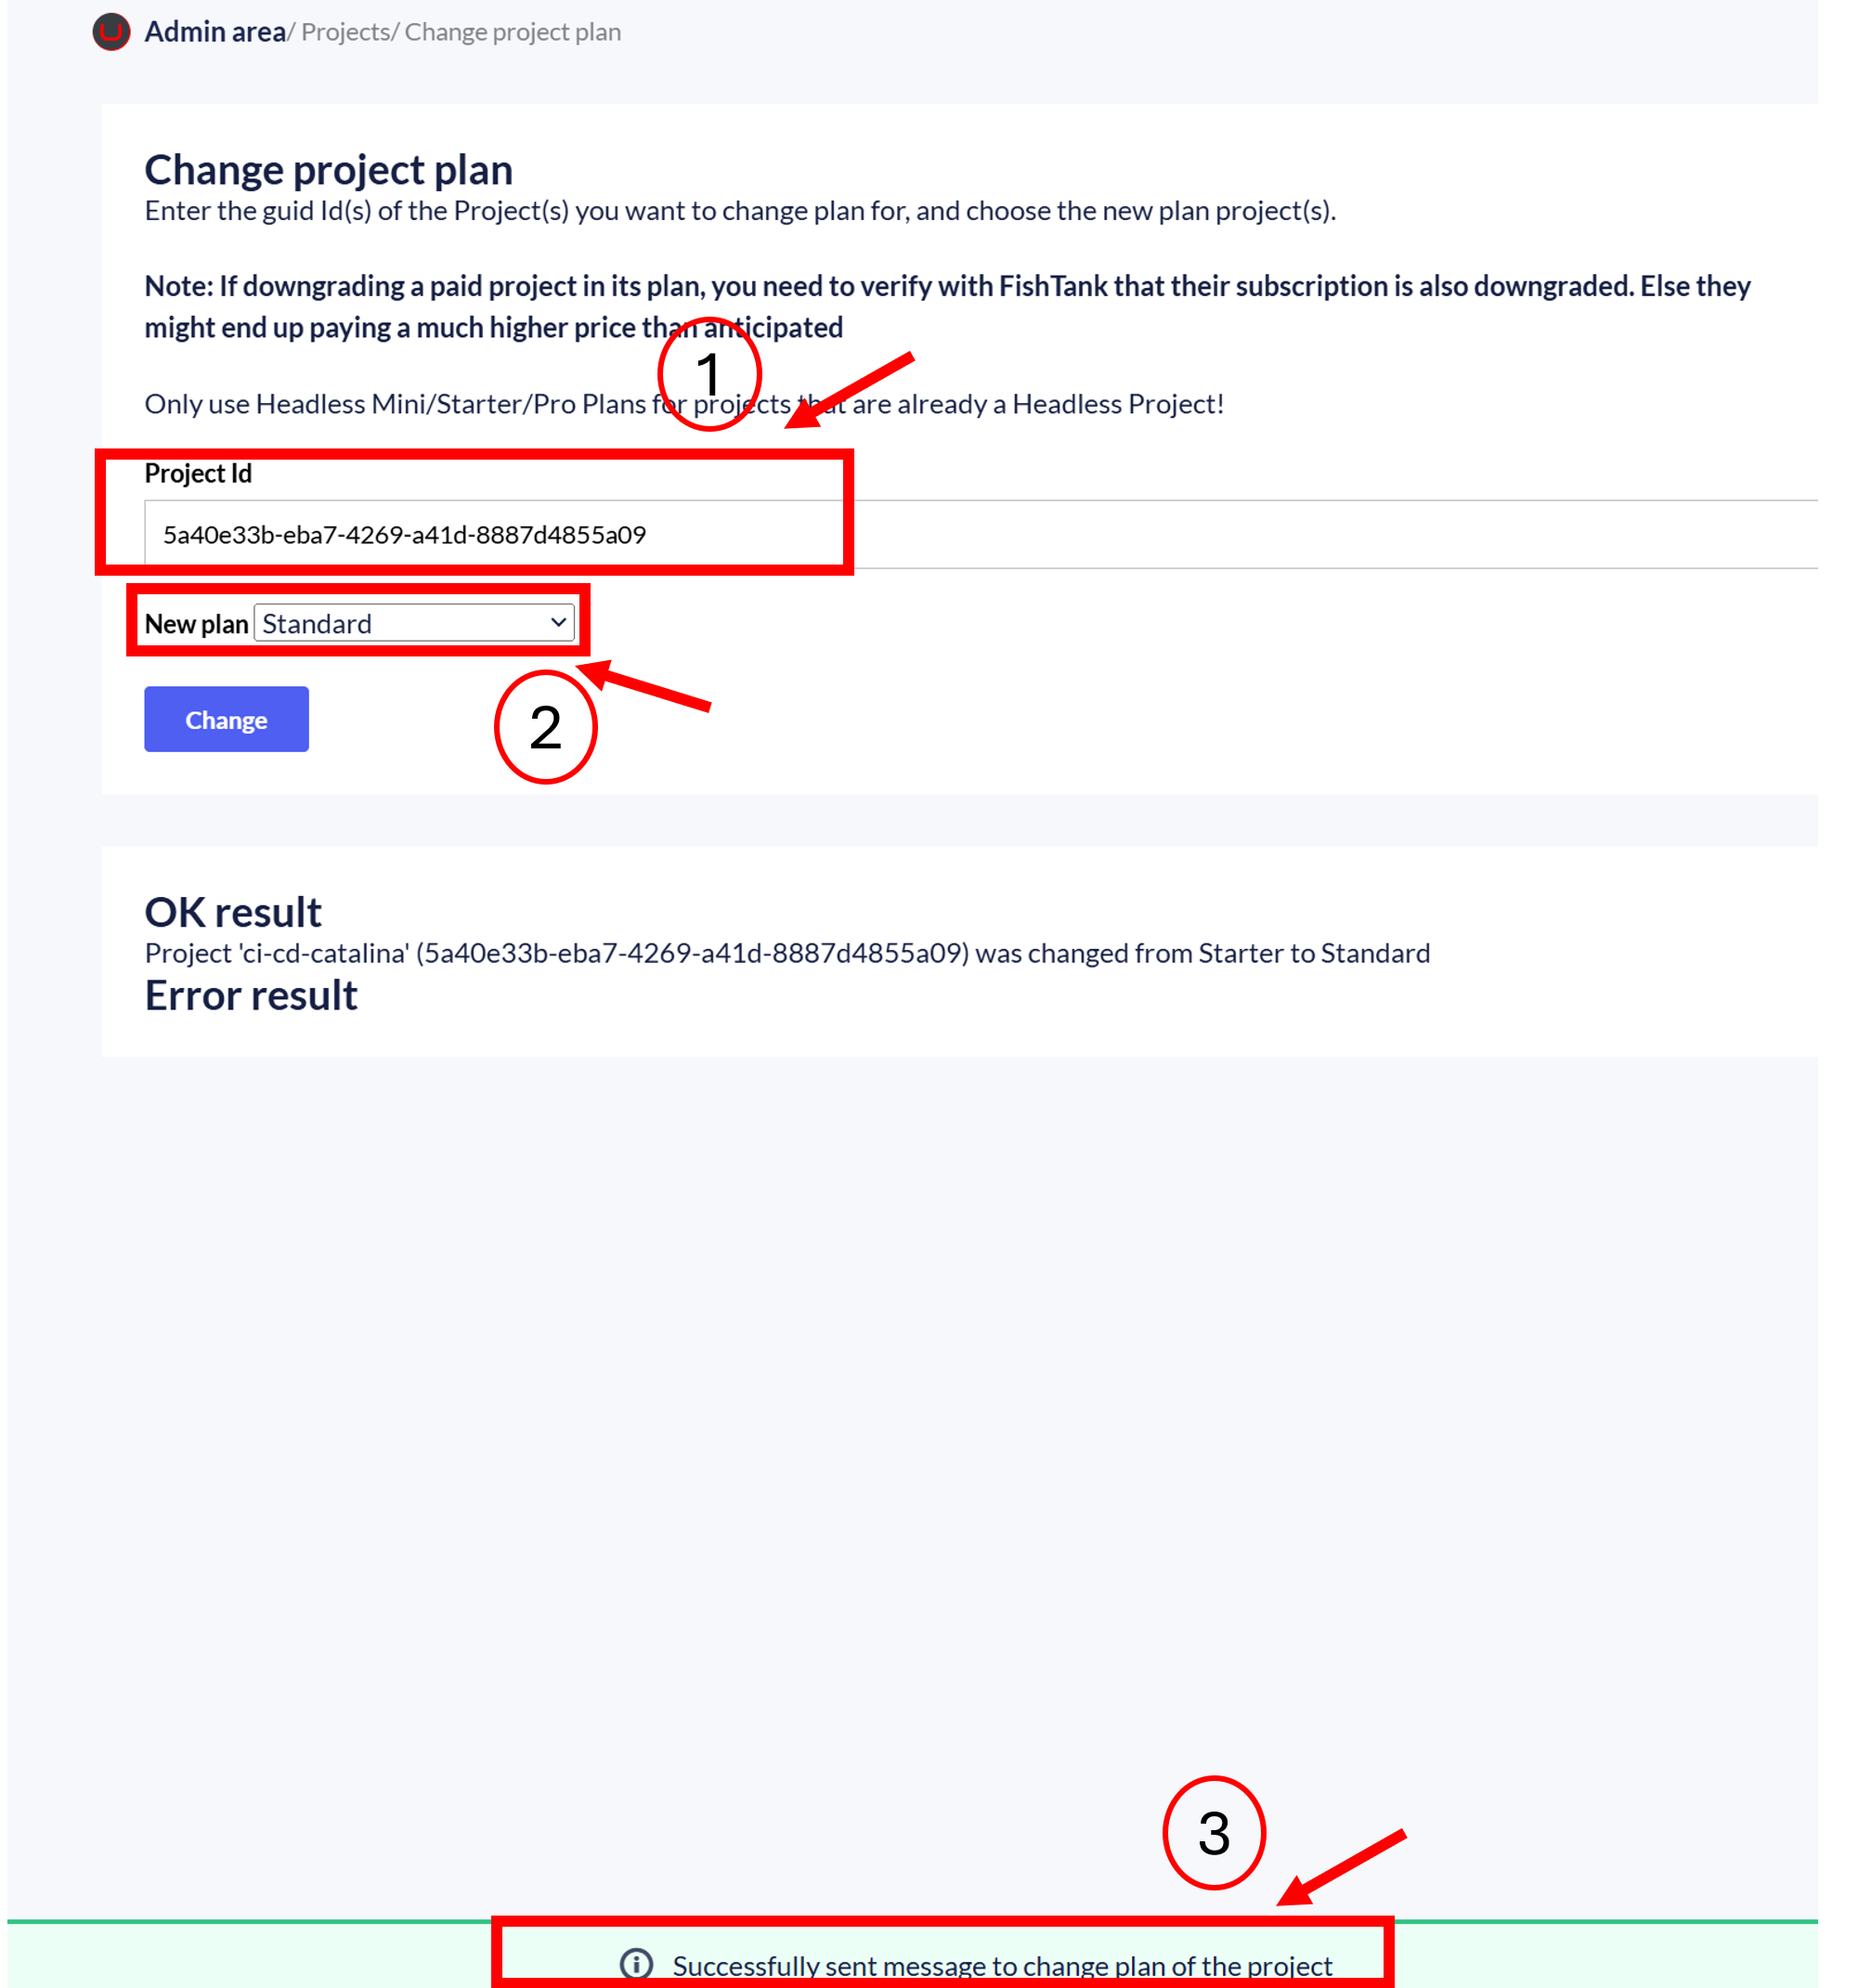
- Change the Project Plan
- Go to:
Umbraco Admin - Change Plan - Paste the Project GUID ID.
- Select the new plan.
- A green confirmation message will appear once the downgrade request is submitted.
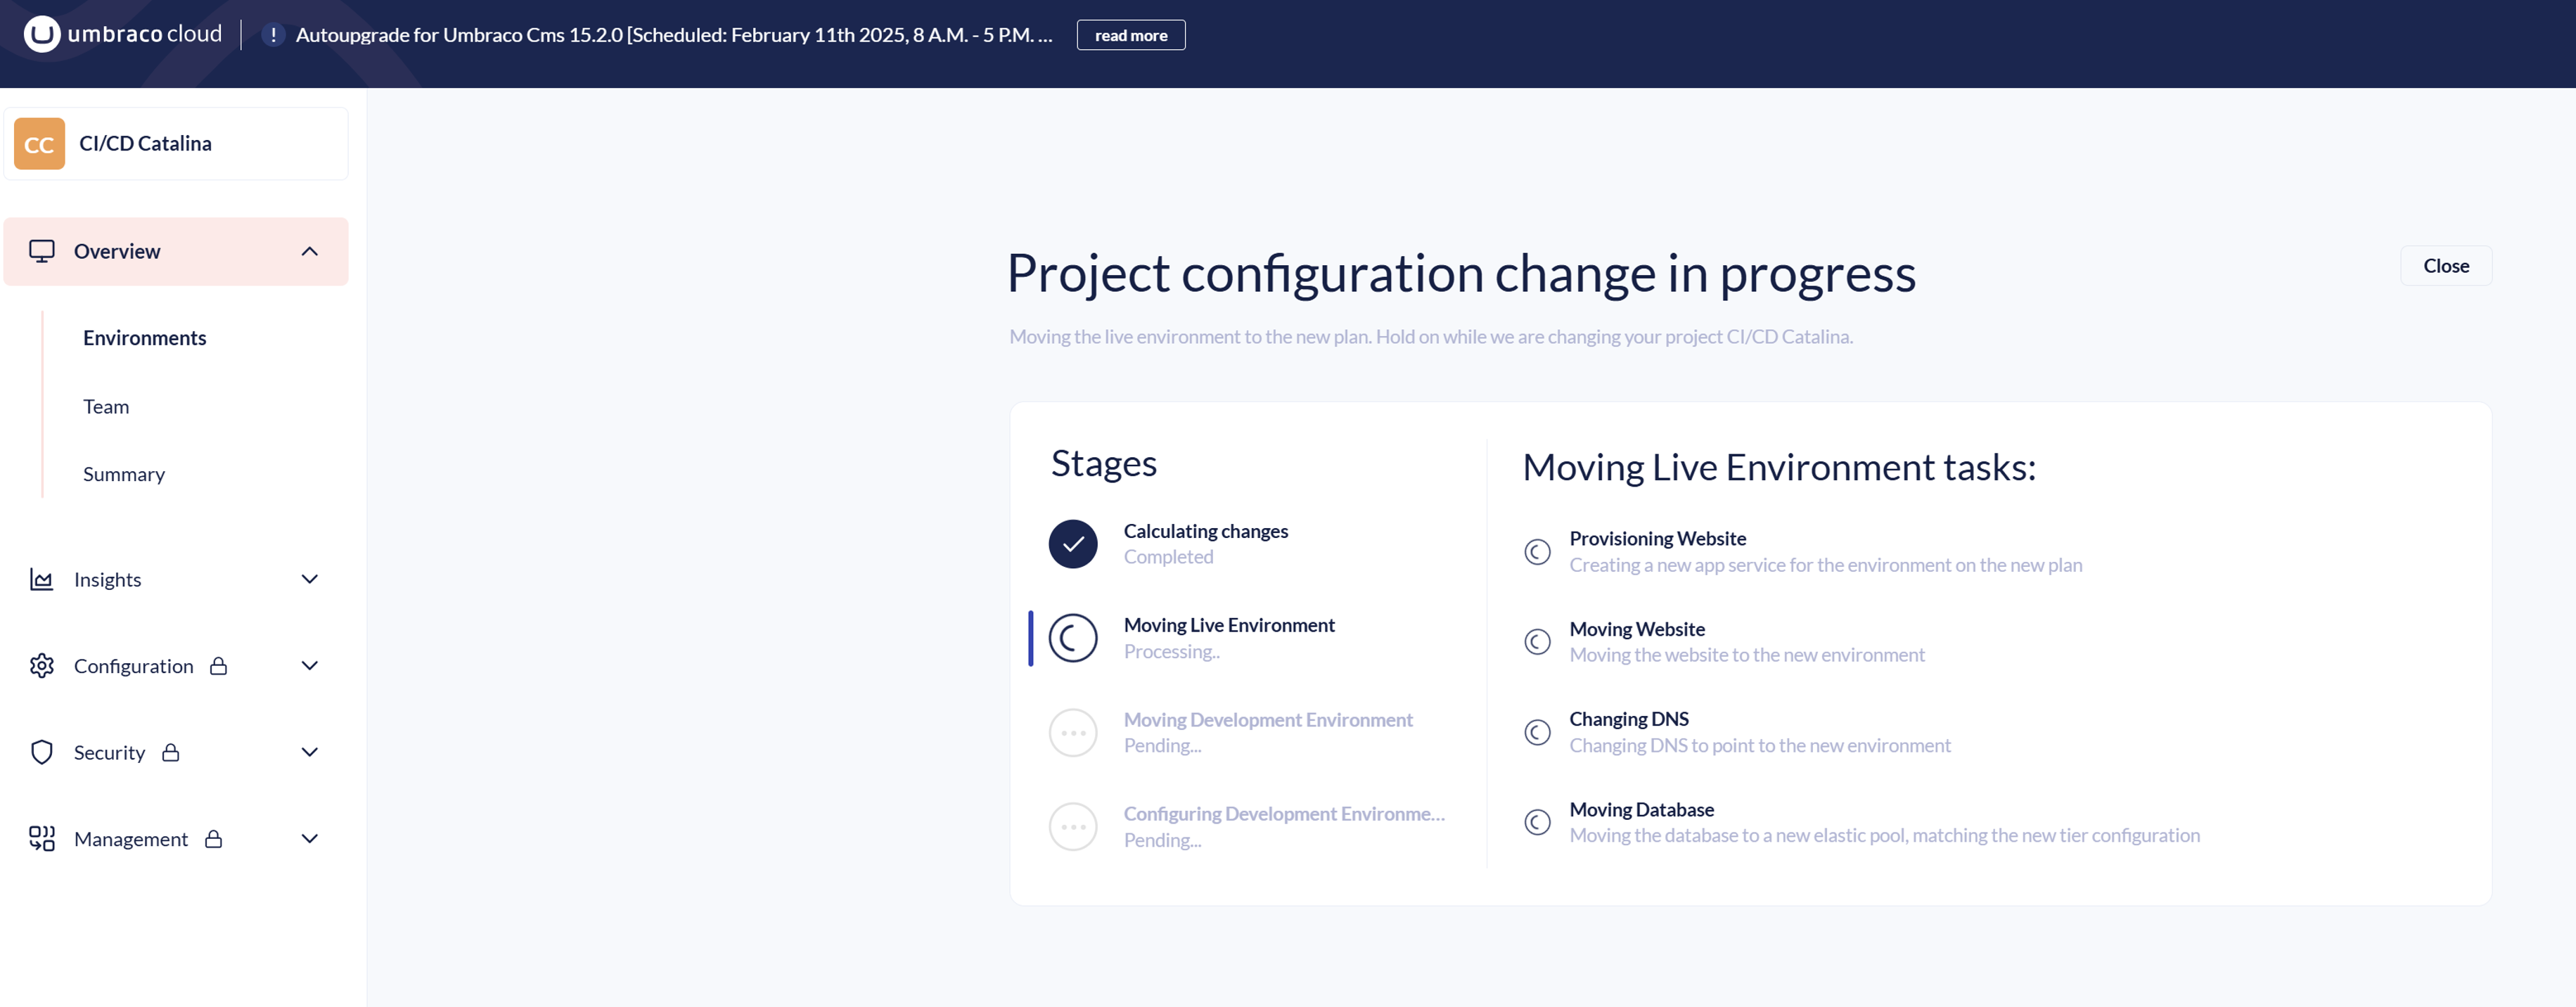
- Verify the Downgrade Process Has Started
Visit the Umbraco Portal for this specific project to ensure that the downgrade process is in progress.
Validate the Downgrade Across Systems
Step 3: Verify the Success of the Downgrade
Even if the downgrade appears successful, it may not be fully reflected across Portal and Azure. Follow these verification steps:
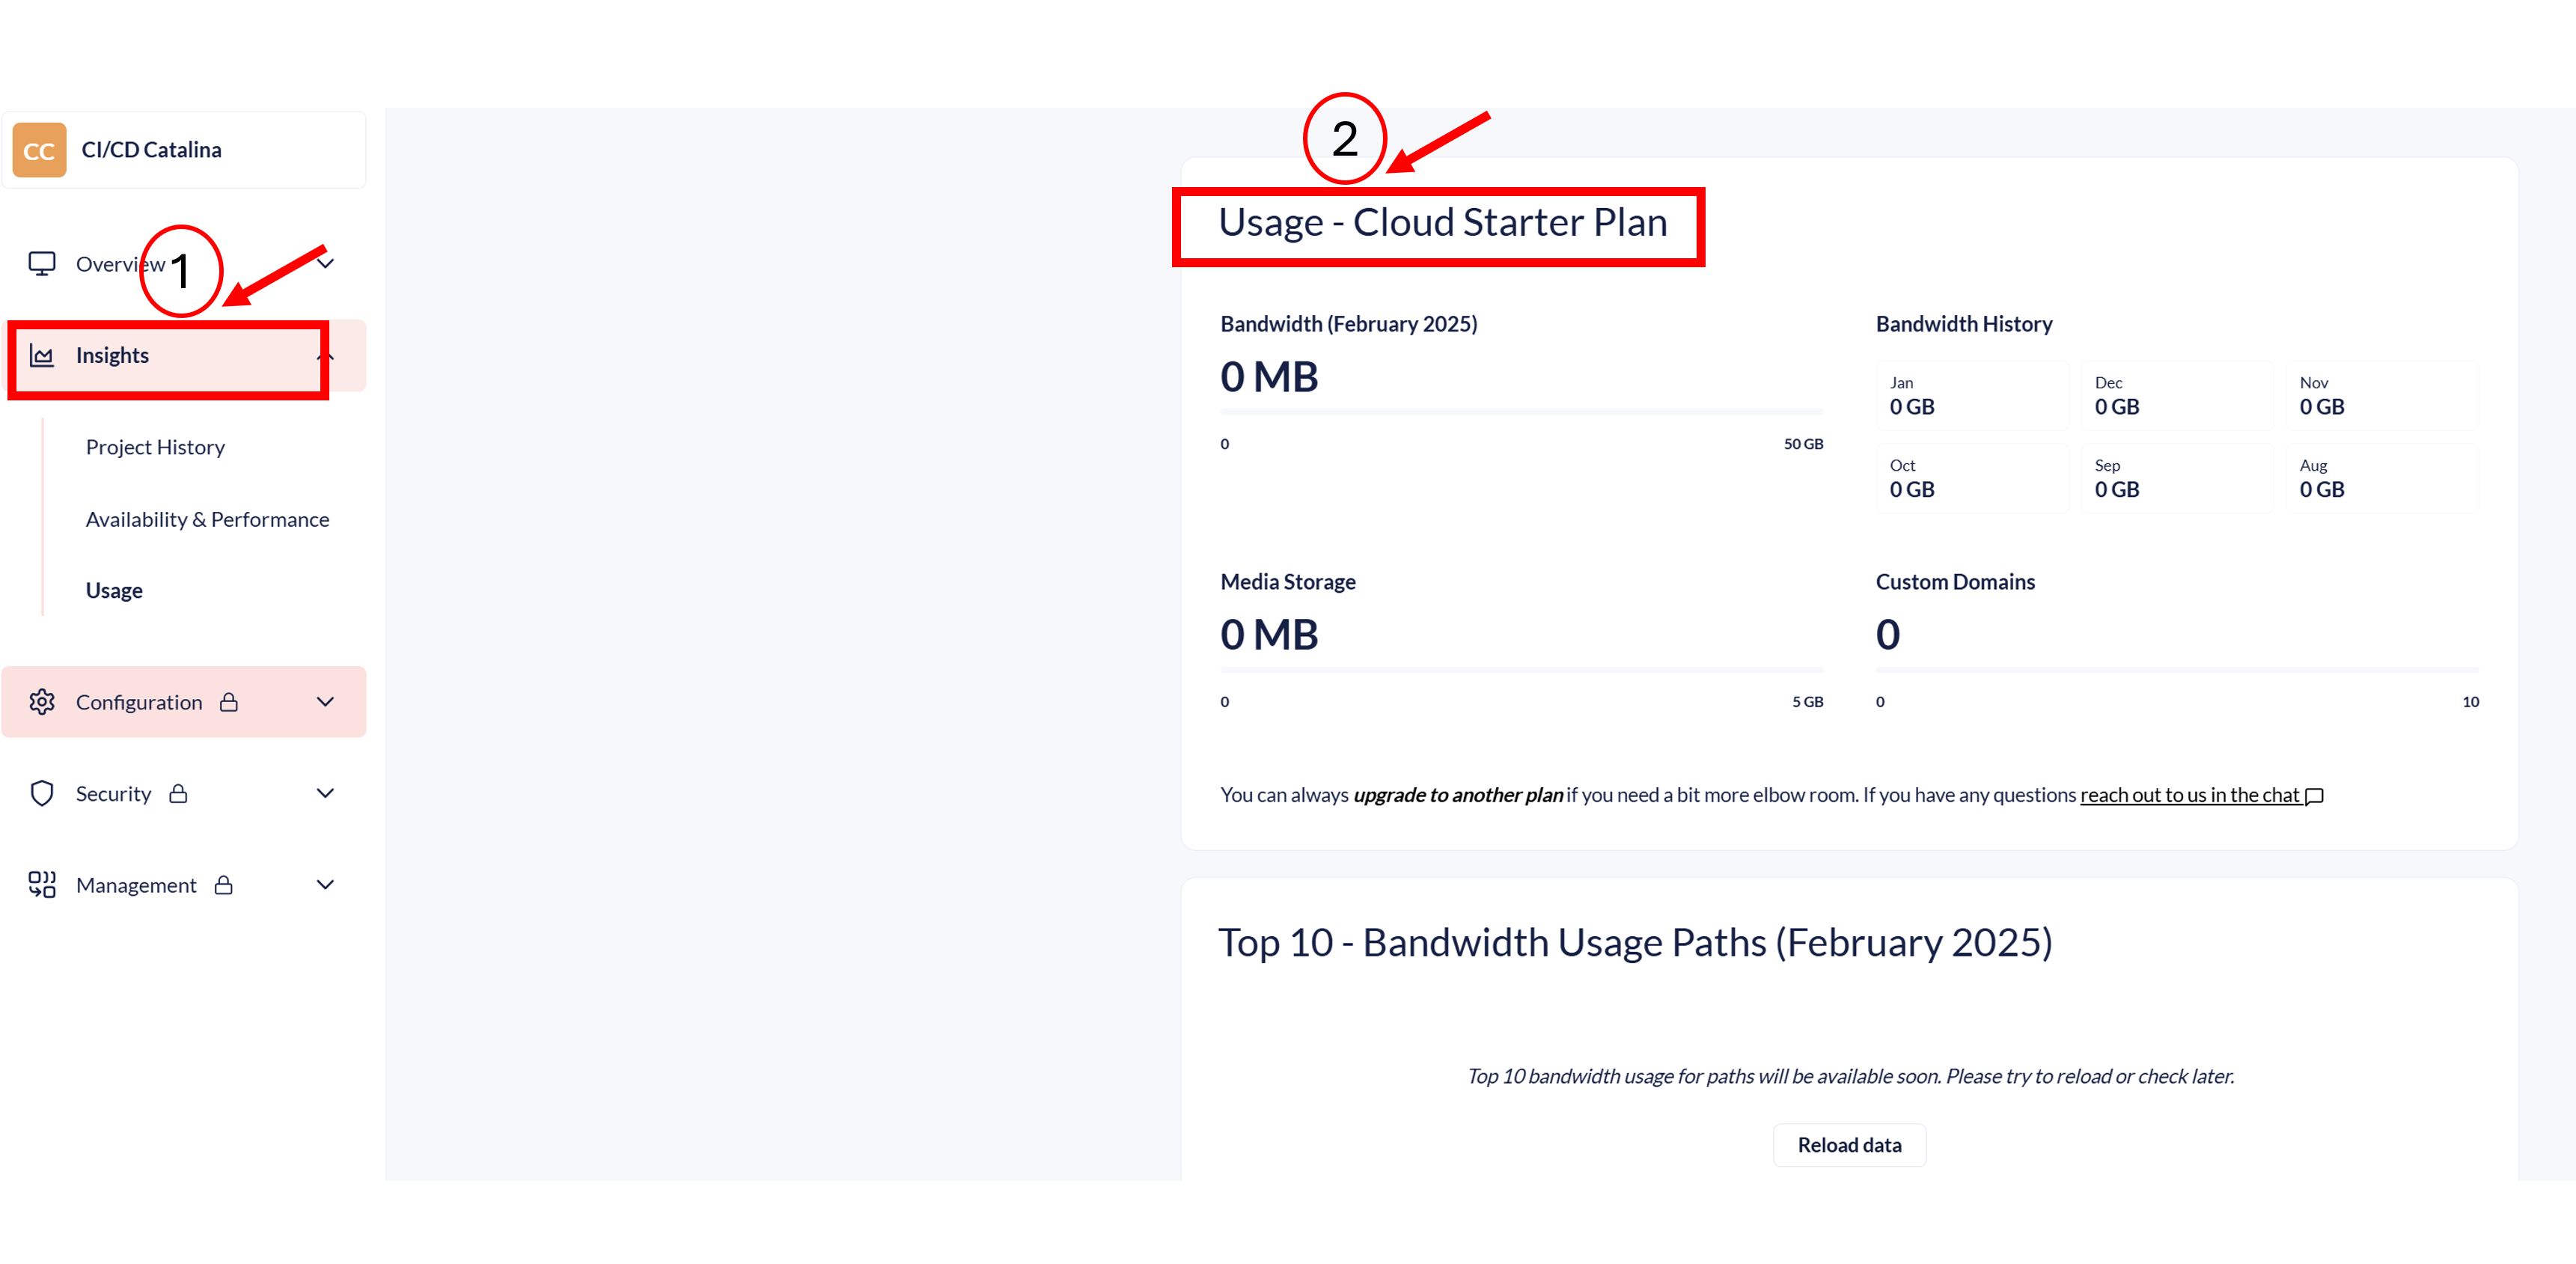
1. Check the Project Plan in the Portal
- Navigate to Portal → Usage or Overview
- Ensure the project plan has been updated correctly.
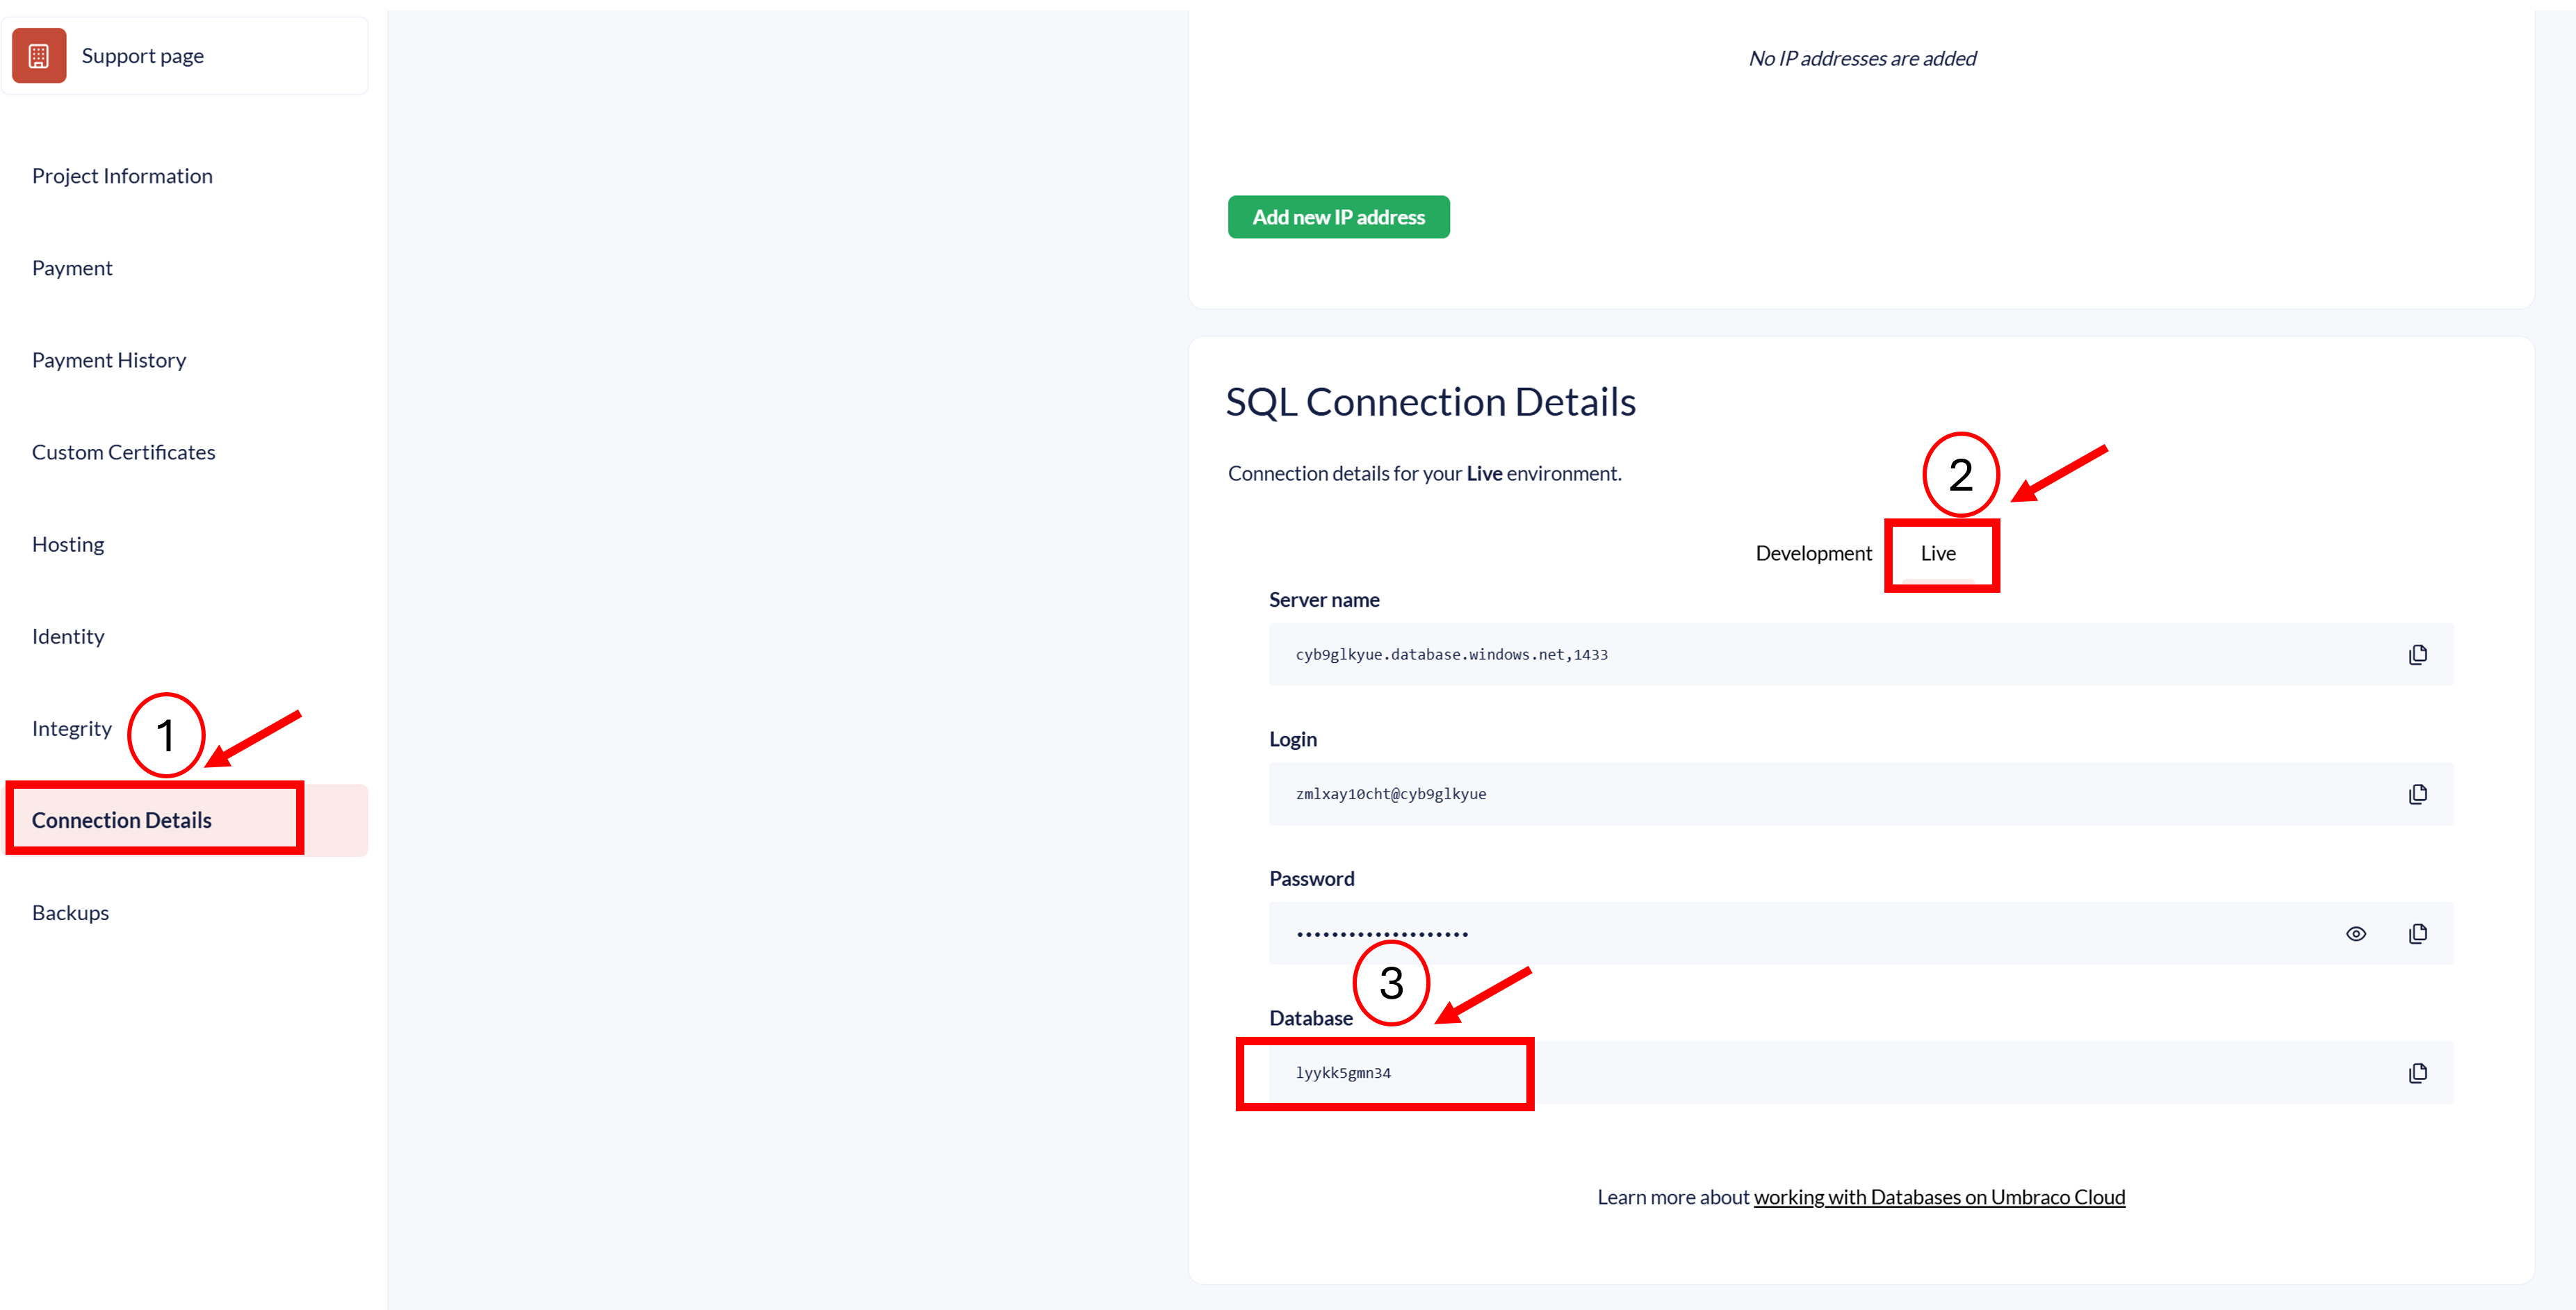
2. Verify Hosting Tier
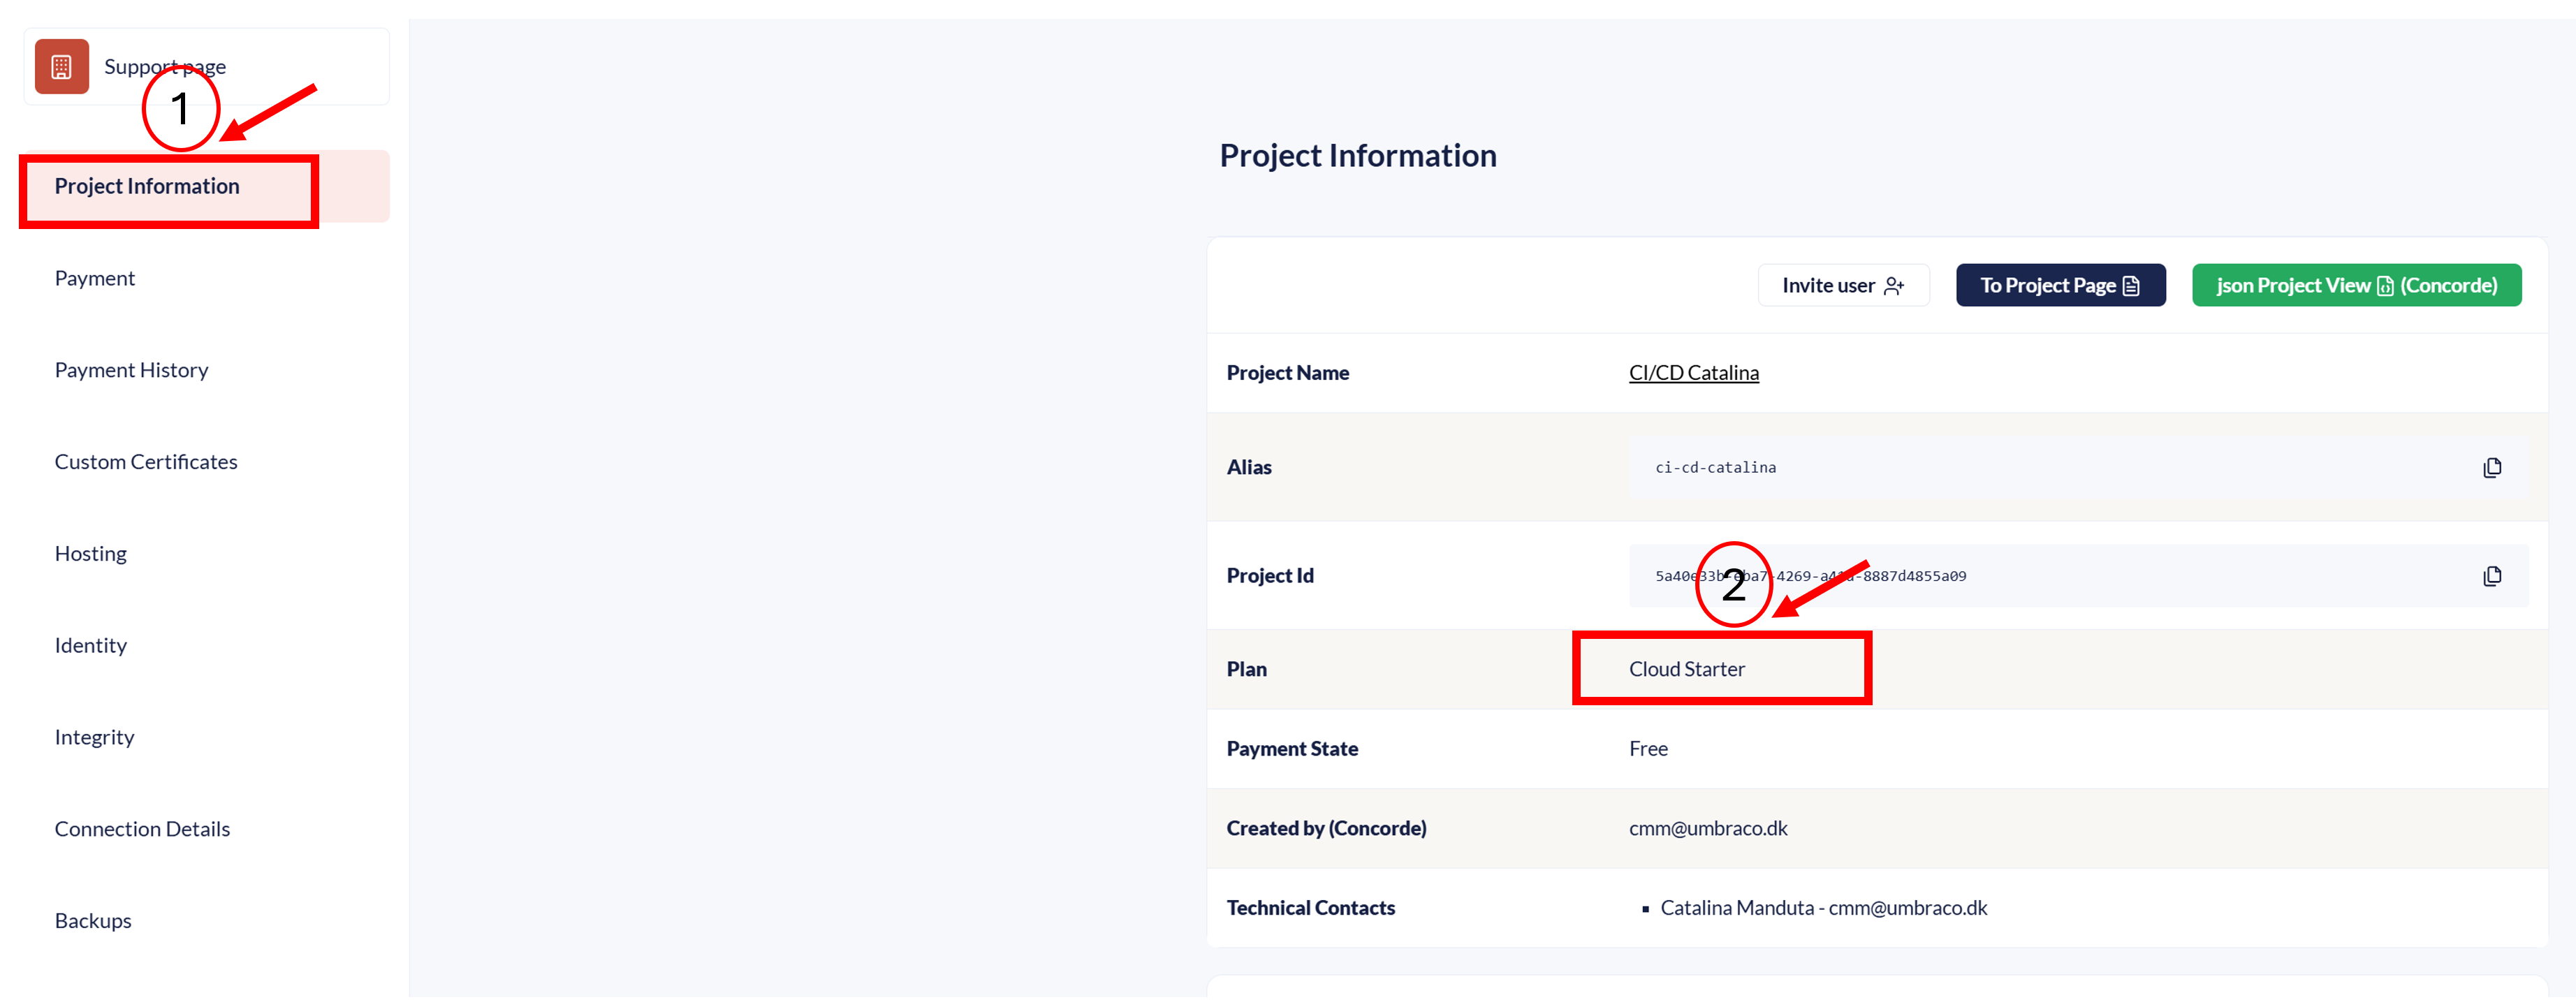
- Go to https://www.s1.umbraco.io/projectsupport/project-name/information
- Navigate to Project Information → Plan
Next, go to Hosting → Hosting Tier and check the plan for each environment.
Note
Need help understanding hosting tiers?
Refer to the Hosting Tier Documentation.
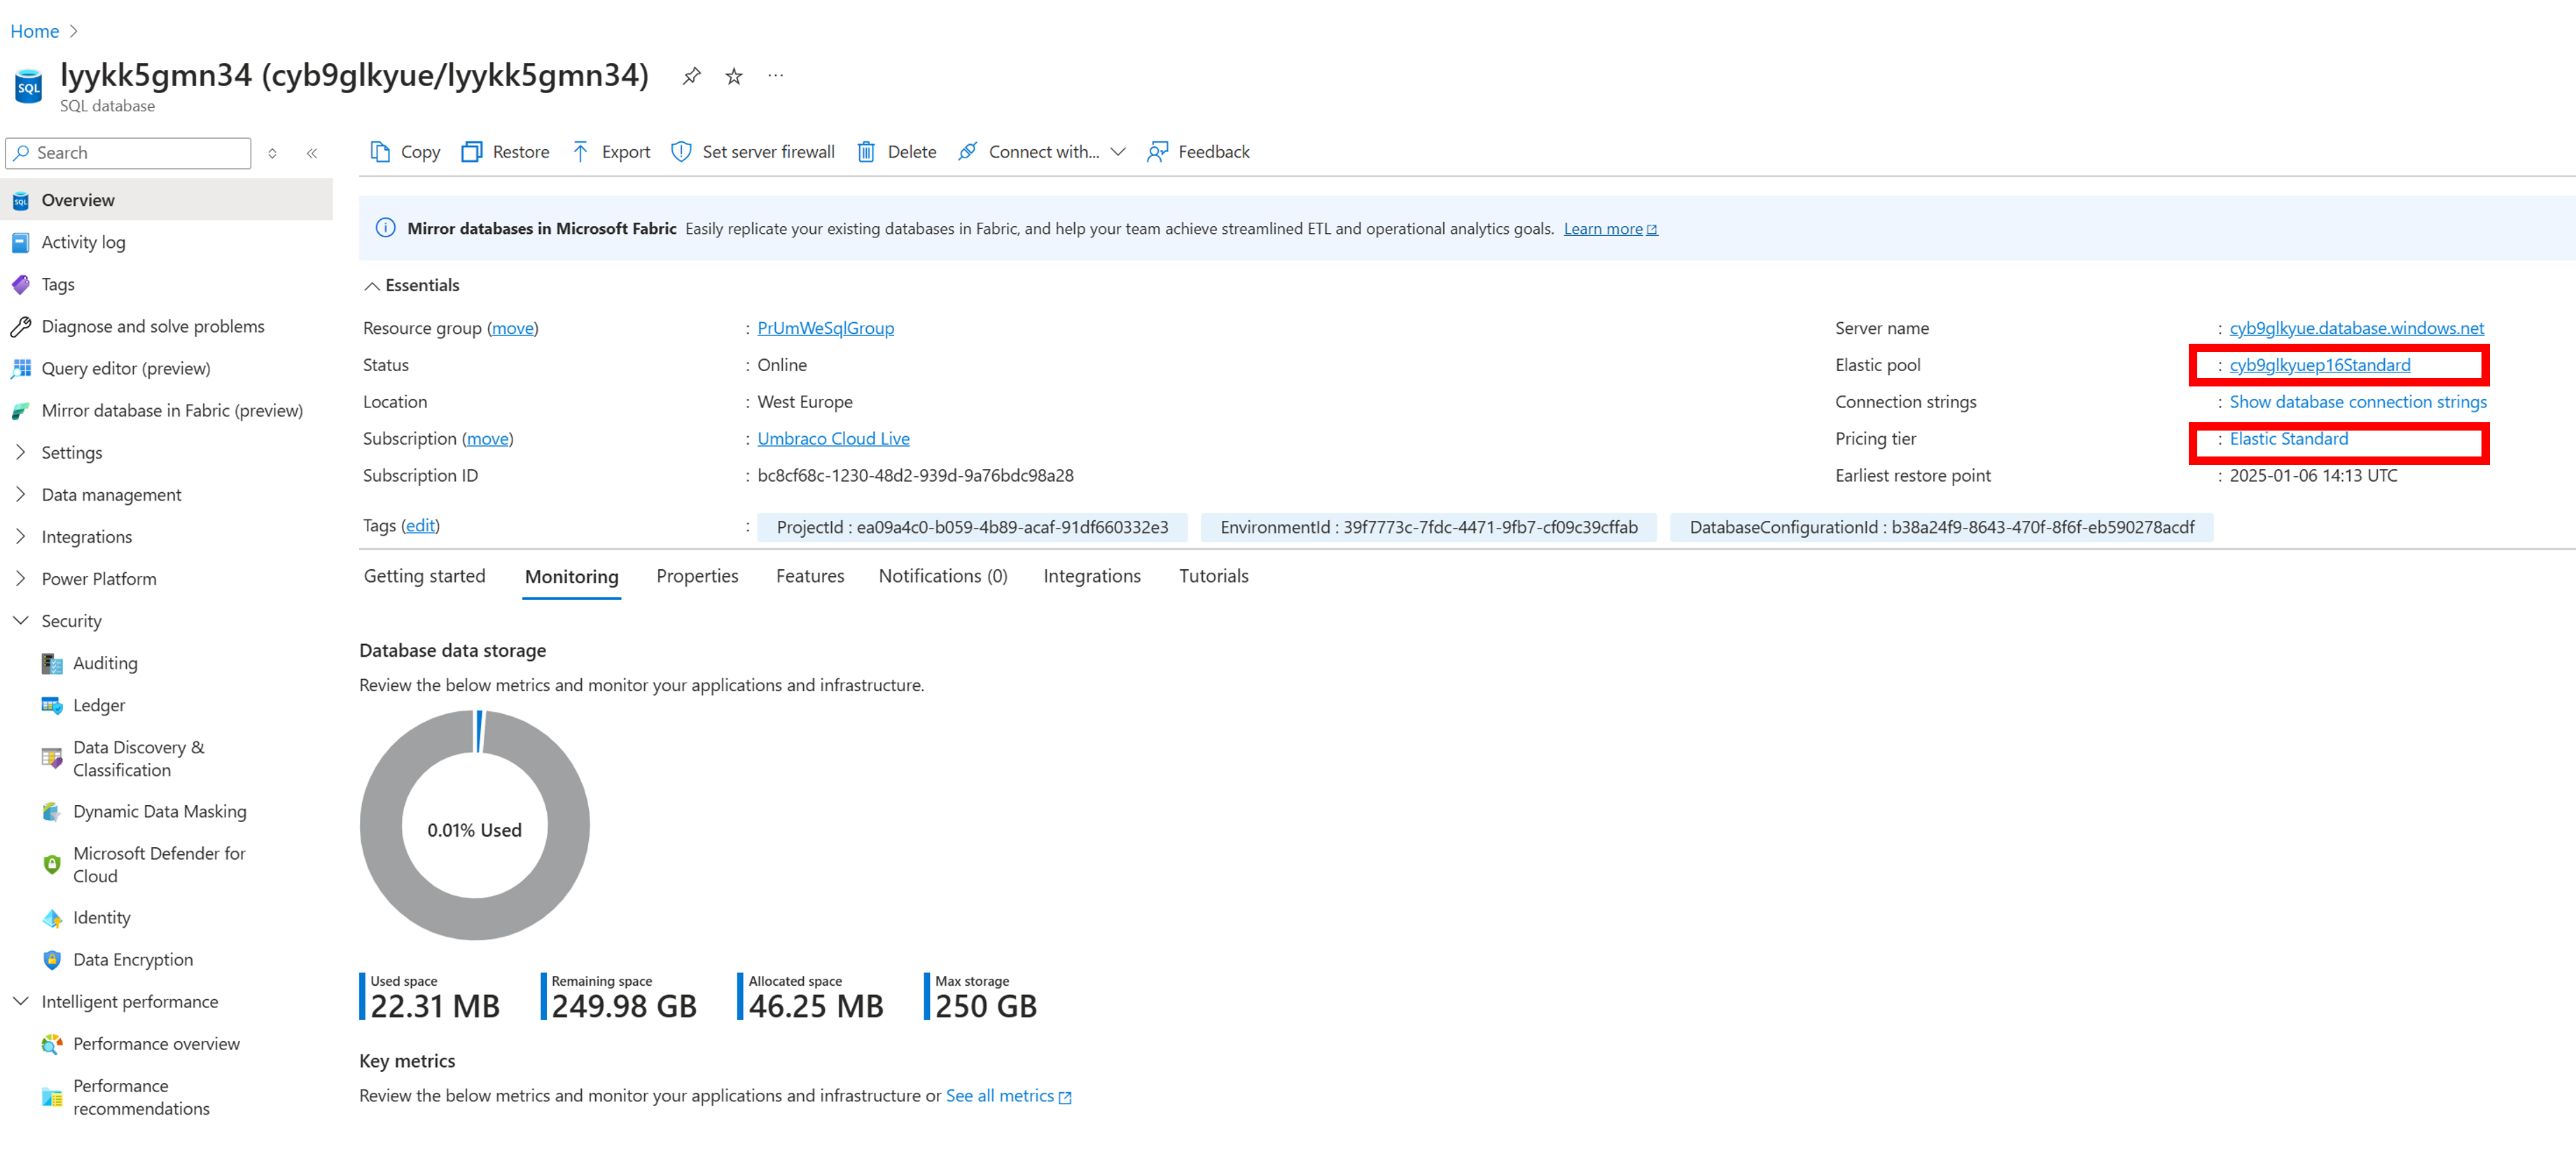
3. Confirm Elastic Pool Changes in Azure
For each environment, check if the Elastic Pool reflects the correct plan.
Troubleshooting Downgrade Failures
Step 4: Troubleshooting Downgrade Failures
If the downgrade fails, follow these steps to diagnose and resolve the issue:
- Check the Project Monitoring Slack Channel
- Copy the project alias and paste it into the Slack monitoring channel.
- Review error messages related to the failed downgrade.
- Verify Project Integrity
- Check if there are incorrect Git remotes that might be preventing the downgrade.
- Look for Other Portal Issues
- Navigate through the portal to check for:
- Failed upgrades
- Failed data extraction
- These issues can block the downgrade process.
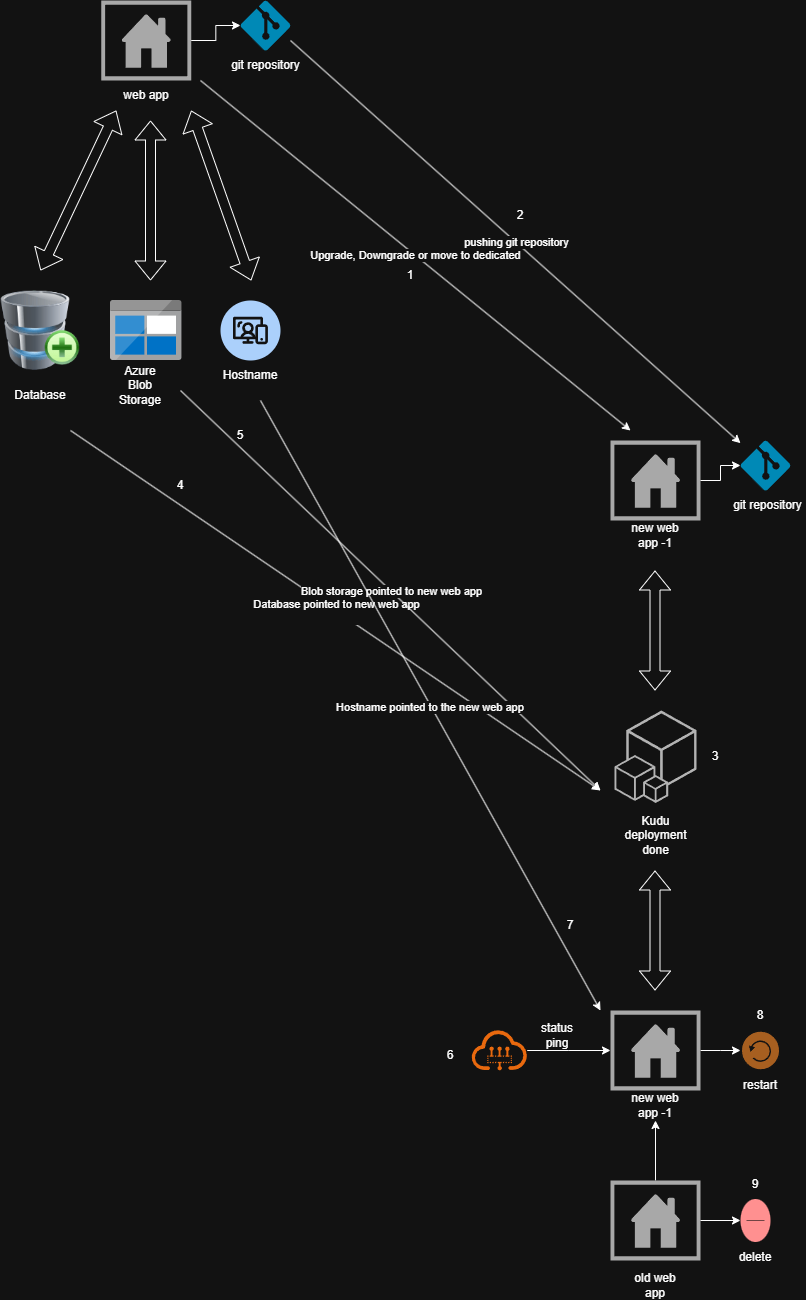
Behind the scenes
How does upgrading, downgrading or moving a project to dedicated work behind the scenes?
Important
This applies whenever an upgrade, downgrade, swap the plan, or move to dedicated resources is performed on an Umbraco Cloud project.
1. Trigger Action
-
A user or Umbraco support initiates an upgrade, downgrade, or move to dedicated resources.
2. New Azure Web App Creation
-
A new Azure Web App is created.
-
The repository from the old web app is pushed to the new web app.
-
The new web app's environment ID is the same as the old one but with a “-1” suffix added.
-
If the project was previously moved, the “-1” is removed instead to maintain a clean naming convention.
-
Web app names are unique, so this naming convention helps in identifying different environments.
3. Build Process & Kudu Deployment
-
Once the repository is pushed, the Kudu deployment system starts.
-
It extracts/restores all files from the repository into the wwwroot folder.
-
At this point, SQL database connection and Blobstoragestorage accounts should already be configured and pointed to the new web app.
Database repointing
-
The old web app's database is now pointed to the new web app.
Azure Blob Storage repointing
-
The Azure Blob Storage connection is updated to point to the new web app.
6. Cloudflare Routing & Status Check
-
Once the new web app is set up, it is pinged to check its status.
-
If it responds correctly, Cloudflare’s routing table is updated to direct traffic to the new web app.
7. Hostname (Domain) Reassignment to the new app
-
The domain names and hostnames are reassigned to the web app.
8. Web App Restart & Finalization
-
The web app restarts, causing temporary unavailability (1-3 minutes) depending on size and startup time.
-
Some websites may require multiple reboots before they are fully operational, especially if they have long restart cycles.
-
Newer websites usually start up quickly, minimizing downtime.
9. Old Web App Deletion
-
Once the new web app is confirmed to be running properly, the old web app is deleted.
-
The new web app remains the active production environment moving forward.
See below diagram: